Real Devil's Thumb Hints
First, a gpx of the options
(right-click and choose "save as" on PC; long touch and "download link"
on Android). Thanks to Bob Burd for letting me add part of his tracks to the gpx file.
Pics by Harlan W S
April 27, 2021
April 23,
2022 NOTE: The new ascent line was recoated with urethane and UV block
today, to reduce abrasion.
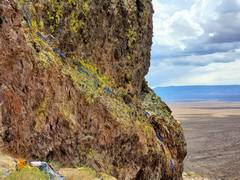
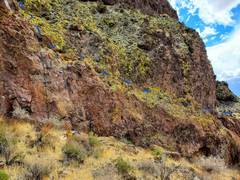
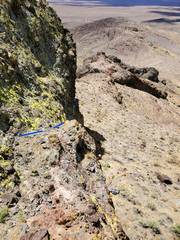
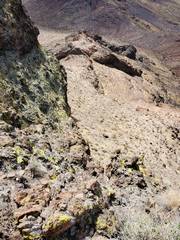
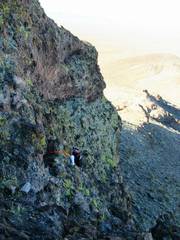
There are three major scrambling/climbing steps to the
north face route: 1) getting to the top of the first vertical cliff
band; 2) getting up the 3+ rock to the upper rap station; and (3)
breaking though the last cliff band. You can accomplish (1) by ascending the fixed rope, or by
using the creepy ledge bypass described below. From the top of the
first cliff band, head climber's left (east) on successively higher,
easy ground, till you are stopped by a wall with a small alcove (or
cave) at the bottom. Start step (2) here, facing south into the rock,
and moving up and right; follow the very textured rock up to the right
(west) side of the rappel station. Head behind the rock horn (that
holds the rap station slings), and head left and east to a slightly
sloped, open area just a few meters away. Then turn R (S) and look at
the top cliff band. For step (3), head S and on the R side of a small
gully, up highly textured rock; it is steep but just class 3. Be sure
to note where you broke through. The summit is just to your L (E).
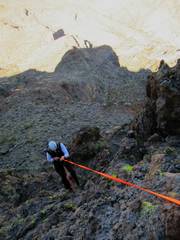
The rope is near-vertical; DO NOT USE IT AS A HANDLINE-- use ascenders or friction knots (latter preferred, but see below).
If you use it as a handline, you will invariably move the rope over the
sharp rocks and damage the sheath. Be considerate of those whose future
safety you may compromise. PLEASE DO NOT USE the thick 10.5 mm rope for RAPPELS.
The extra urethane coating, which supplies the main UV-resistance, will
be worn-off by rappel devices. There is another quicklink, on another
line, to use for rappels (someone took the link after 2022). Near the top of this line, the slope lessens,
and one can put feet down to partially climb; but stay attached till
you are really clear of the cliff.
Bring light
harnesses.
Bring 80 feet of 8-9mm rope or 15mm climbspec tubular webbing for
two short rappels (the webbing is 2/3 as heavy as the rope). From
personal experience, 75' of 15mm webbing doubled over a biner, with a
single munter, was adequate for the raps.
There is a dark sling of 4000 lb test, UV-and-abrasion-coated
Dyneema on ANOTHER rock horn at the top of the 3+ section
(section 2). Note this sling is made of pure Amsteel Dyneema. UNLIKE
Dyneema slings used in climbing (which are really 35-50% nylon by
volume), IT DOES NOT TAKE KNOTS, but the class 2 eye splices on each
end (by the rapide) have 100% rope strength. The urethane
UV-resistant coating may make the slings feel stiff or sticky. PLEASE
EXAMINE the 4000 lb sling, end-to-end, before you use it. Some of the
UV coating wears off the outermost fibers in each rap, so it gets a
gray-flecked appearance, but unless you see major breaches, you have
nothing to worry about. Remember that Dyneema is used in bear bags,
cut-proof gloves, and bullet-proof vests. If
you pull the sling over the horn to "equalize"
it for your intended descent line, you are probably doing the only
thing
that can damage it; the rock friction around that horn resists body
weigh, and you will be effectively dragging the sling over a file. I
have seen many nervous people rap off that sling using "just" the 4000
lb loading on one side, and the other side doesn't budge. All
dark ropes should be replaced by 2027. Someone put a white
dyneema/nylon sling up at the horn; UV will hit that hard, and it isn't
mine.
There is a second, longer sling of black urethane/UV coated, 2500 lb Dyneema
on the same horn. I put this sling up there 11/20/2022, and intend to
bring it home and break test it in 3 years (if I'm still around). You
can use it if you like, but don't give me crap about shock-loading if
you choose to use it in conjunction with the shorter 4000 lb sling. For
the record, the "new" 2500 lb sling replaced a NON-UV-coated 2500 lb
sling that had been up there for 3 years, and still had 71% of the
original strength. Someone took this down in 2023/24.
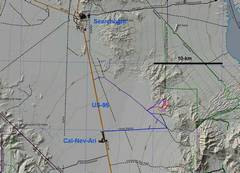
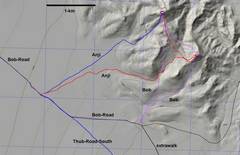
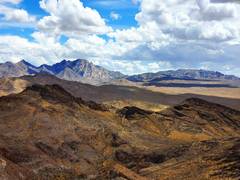
The GPS shows more road options for more modest vehicles. The first
part of south route (via the Loran Road) is 2wd, and can be done by
modest-clearance vehicles (verified 01/08/2022). (The older traditional
approach is labeled
"Bob," and has some rough sections.) The most irritating part of the
Loran Road is a patch of old pavement; even though this section rarely
has more than 1" topography, an inattentive driver can drop off the
ragged edge. From the end of the Loran Road, one can either take a dirt
bike on the rest of the blue road that takes a sharp left (and heads
roughly NW), or use the short "extrawalk" segment across the desert to
join Bob Burd's hike track. The last, NW-trending section of road has
some substantial side-to-side uneveness, but is mostly composed of dirt
(some loose sand); if you choose to drive this with a marginal vehicle,
be sure to have a shovel and some method to escape loose sand, such as
thick carpet strips, a board, or even your floor mats.
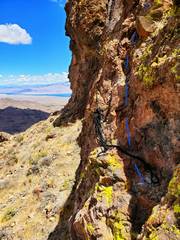
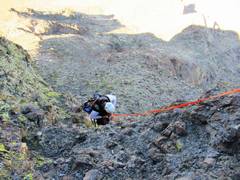
Besides the rope assist, there is a pure ledge route that is not for
the squeamish. The "ledges" are at times on a 60 degree angle, and
there is one corner that requires one to step down to pass an obstacle,
and even though the fall might be 8-20', it would be onto sharp rocks
and a slope. This route is not for really tall people or really short
people. However, excellent balance and flexibility help a lot. Except
for the psychology, if one has no trouble with some awkward routes in
Red Rock (e.g. the one 4th class traverse on Tinaja Peak), this is
doable but a lot creepier. I found just the ocstacle on the ledges was really creepy. Even if you took the
ledge route up, you will absolutely not
want to take it down.
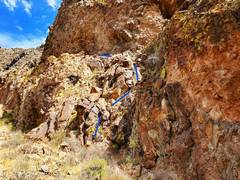
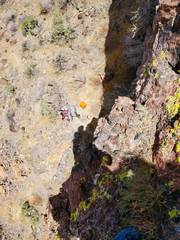
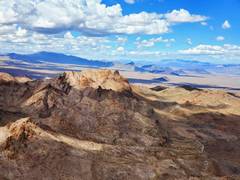
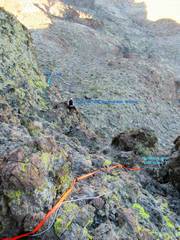
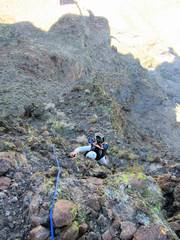
The best way to see how the pieces of the normal route fit together, is to view this drone video. This shows Tracy
using the OLD ascend line to rap. This line was farther east and harder to use.
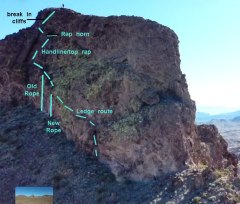
image from video
|
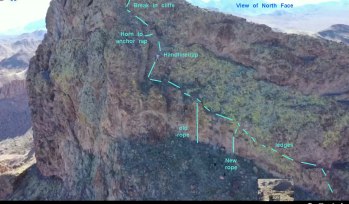
image from video
|
At some point I may move the new ascend line up eight feet; but it has
a hook onto which an 8 mm double rope, or etrier, can be dropped. I
will put a notice here if that change ever happens.
|