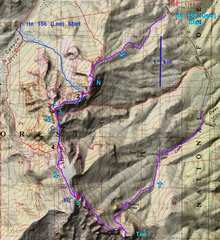
 Overview map IDs the summits as N (Nose), F (Forehead), C (Chin), Tu (Tummy) and Toe, also identifies the 2 typical starting places, and numbers the 5 problem areas. Lee Canyon start requires a car shuttle |
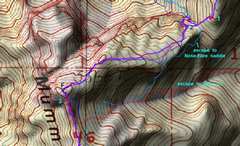 closeup of the first 3 problems areas, with one shunt for bad weather (light-blue track). |
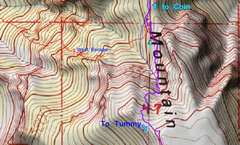 closeup of the 4th problem area |
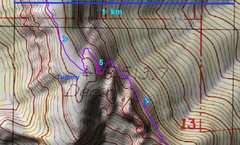 The 5th problem area My gpx file may show the fast (scary) descent to gully; dotted line symbolizes easier traverse along base of east wall of Tummy. |
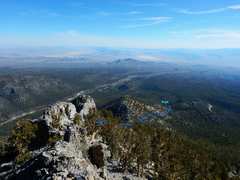
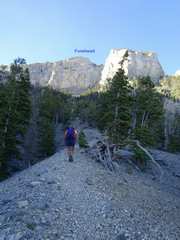
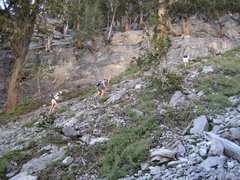
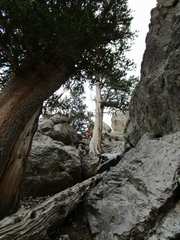
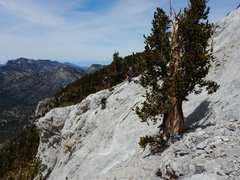
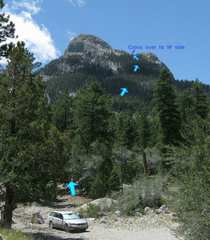 Start from Deer Cr. Road (rte 158). We are looking SW at the route up Nose. The route to top can be all class 2. |
 The top is of Nose is at left. To this point you've been traveling on the east side of the ridge; you are about to cross to the west side. The track in the gpx may show a route that meets the ridge farther up on the left (east) side), and then traverse to the right (west side. |
 Looking back ~NNE from the previous picture |
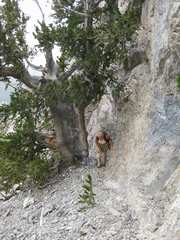
 Here is Paula , vie NE, now on west side |
 Again, view NNE, about how we got up here
|
 Next one traverses on the west side, below cliffs. View N. |
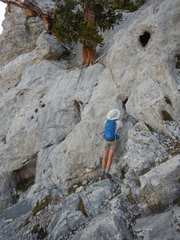 There is one totally optional hard class 4 shortcut , less scree and class 3 above this section. Tough for short folks. |
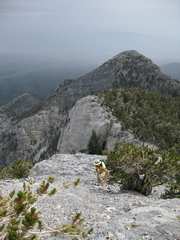
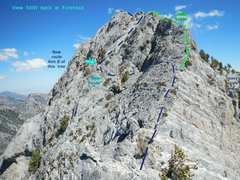
 Now we are at top of Nose, looking SSE, with the rest of the route outlined. We will now descend Nose following cairns, to a slight obstacle, #1. |
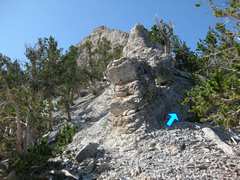
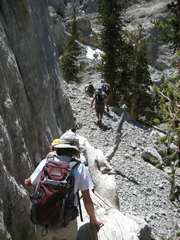
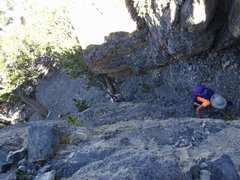 Obstacle #1 is a mild 3rd class chute, if you find the right path. As you head S from Nose, suddenly you will come to a cairn at the top of a cliff. At this point look right (west) for more cairns that lead to a ledge on the east wall of the chute. The ledge has exposure, but is actually easy. Then you enter the chute, turn S, and watch for loose rock. If you miss the ledge and just go down the top of the chute, it is easy class 4 that requires some stretching. |
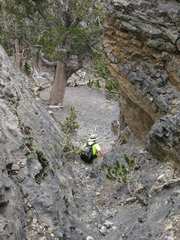 View S down to bottom of chute, from
within chute. |
 Joel in chute, view back N |
 View NE up chute |
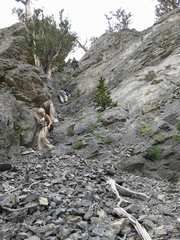
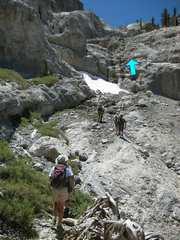
 This and the next photo relate to a start at the western TH on Lee Canyon Road. We are looking SE at the true Forehead. Shortly the use trail will drop left into the gully. Long ago folks continued up on the left (N) side of the gully through steep talusy woods. Now most stay in the gully till... |
 ... they reach an area with low bushes, then look for cairns to climb left (N) out of gully. Again, this and the preceding photo are the only photos relating to the Lee Canyon start. |
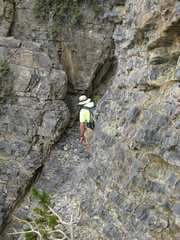
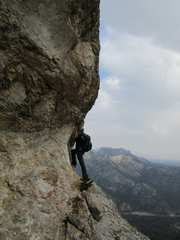
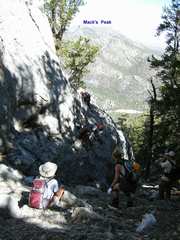 Obstacle #2, a class 3+/4 wall. Note we are looking NW toward Mack's Peak. Note-- you can avoid this entirely, by heading up then down at the east end of the Nose-Forehead saddle, and following the light blue track in the 2nd map of this album. |
 At least as of last week, the correct wall was ID'd by a small pine growing out from the cliff. It's very frictional rock. In the "old days" I would simply body anchor behind the left side of the cliff; now there is a bolt anchor. |
 View back down (to SE ) |
 Another view back down to SE, again showing the 2' pine |
 Once at top of the small cliff, look right, immediately NW; note Mack's in the back again. Go hard LEFT around the corner (as if you have a choice). |
 Here's a view back looking SE at the corner. The climber is about to turn hard left. |
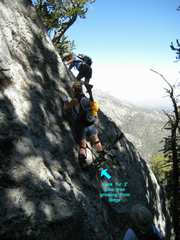
 After the last hard left, you go straight and reach this wall. Climb on this wall, and take another hard left. |
 Climb up this gully, and at the top, take a hard right across soft talus and pine needle, and then a hard left again onto the gently sloping NNE slope of Forehead. |
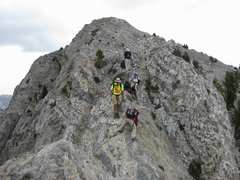
 View NE to Nose as Joel comes up last stretch to Forehead. |
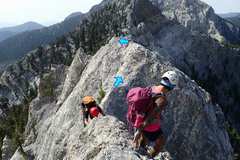
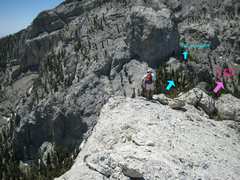
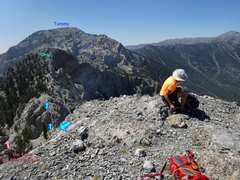 Now we are on Forehead, looking south. The blue arrows show the start of the knife edge route; the red arrow shows a way that avoids the knife edge, at the expense of dropping down a bit and travelling on talus. You still must watch out, as one obvious route on the left ends on top of a cliff. The dark blue track in the second map shows this bypass. |
 Partway off the S side of Mummy's Forehead, showing the first lump to climb via an easy crack |
 Now we're just below the lump. |
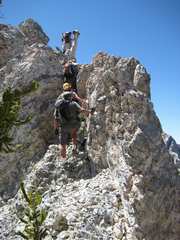
 One traverses S and comes to the next difficult section; I'm (in yellow-green) right above a thin rock ridge with drops both R and L |
 Another view S of same difficult spot |
 Now I'm past that difficulty, looking back N as Valentina (in purple) works her way down |
 A bit farther down, as folks walk over
another knifey lump, view back N. TRY NOT to |
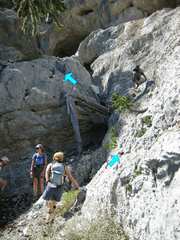
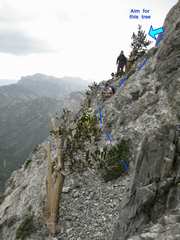
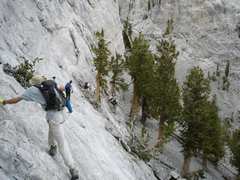
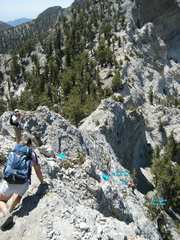 Now the main difficulty in the traverse. One cuts right (WSW) down to the tree from the ridge. Be careful to pick the correct gully. Aim LEFT of the tree. Near the tree, one takes another hard left on what appears to be a scary traverse, but has many footholds on small ledges-- just watch the loose pebbles! Before the correct gully is a dangerous chute that will seem to get to the tree, but goes too far to right and is far too steep.
|
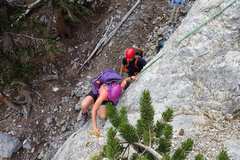
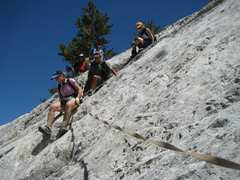
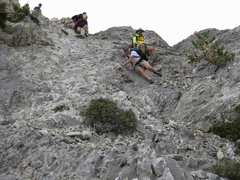 Looking back ENE UP the correct gully as people descend to the tree. I find it easier to crab-walk down the L side |
 I'm looking back NW as people come around the corner and traverse to... |
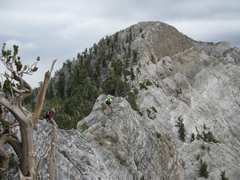 ...this ridge, which ends in a walk-off. Mummy's chin in back. |
 Another view back NNW at the descent off
Forehead to saddle with Chin. The 2006 green route is very crumbly and loose; DON'T GO on the green route if possible. Take the blue route! |
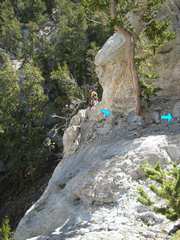
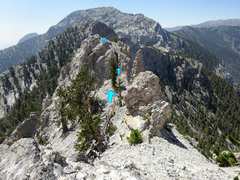
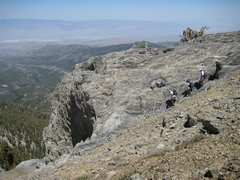
 Now we're coming S of Chin. There are two choices here; the blue arrows follow cairns to the slabs, obstacle #4. The red arrow points down to a gully, maybe losing 100-200', which can be followed uphill with a few boulder obstacles, but avoiding the slabs entirely. There have been avalanches since I last used the red arrow route, so the gully may have debris. |
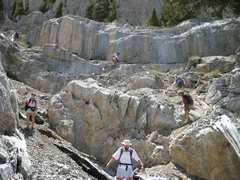
 View of the slabs |
 View back the opposite direction, as people climb off an awkward ridge to cross the somewhat slick limestone |
 View back N at more folks coming across the slabs.
|
 After the slabs, one crosses an awkward steep talus field, down to the same gully used in the bypass |
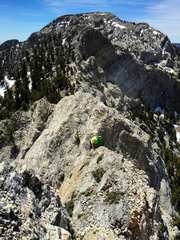
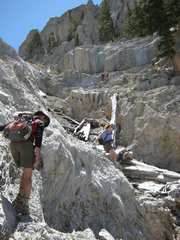
 View SW as we cross the gully and head up class 3, with some loose rock, then turn left at the skyline and head for the tummy. In snowy times, one can cut left (where the snowfield is) and work around back. The GPX file may have that left route. |
 View east from near top of tummy, as group cuts hard left (N), to bottom of cliff, then cuts hard right (SE) to begin obstacle #5 |
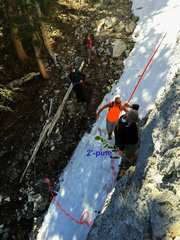
 Before starting the traverse, there is a short downclimb. It is clearer but harder to come off the left wall, or it is almost a class 2 butt scoot. At this point you have a choice of turning right and taking the "traditional" route shown in the next picture, or dropping left. The left route is initially hairier and looser, but after a short crumbly drop, has much less talus. |
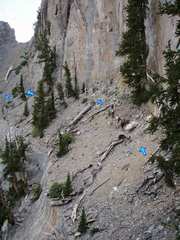 Obstacle #5, view S. This traverse to a gully, can be handled in two ways. The gpx file probably has my route to left (out of frame), which is hairier; it's class 3+, but with loose rocks, and one can't afford a slip. The way shown is easier, with more talus The next image is left of this one, a bit farther S and shows... |
 ...descent down to top of gully. The Gully
cuts off hard left (NE). In next 2 images, I'll be in the gully,
looking up (SW). If you had taken the initially hairy L route, you would have avoided the messy talus. |
 Here I'm in gully, looking back SW as people negotiate the end of the traverse and descend into gully |
 Still looking SW, a bit farther down gully.
The rock on the east side (left side of this photo) is usually easier than the
talus-filled gully; the rock can be kept class 3 down to almost the bottom of the gully. |
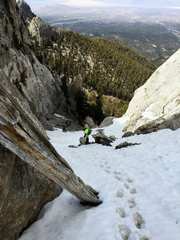 View NNE down gully in snowier times. After descending the gully, hang hard right. |
||