Hand-Sewn Loops: Break at 196% for 16mm Webbing, 167% for 5 mm Cord
(WARNING! DANGEROUS ADVICE ABOUT SEWING! TURN BACK NOW!)
Two more examples of hand-sewn gear that does as well as machine-sewn stuff... IFF you follow the rules. The pattern is nearly irrelevant.
What matters is that you follow:
strength of seam = k*(strength of thread)*(number of stitches),
where k=1.5 for stitches with a bottom and top thread (e.g. sewing
machine) and about 0.75 for single-thread (most hand stitching). By a
"stitch," I mean a penetration through all layers that are sewn
together. I set "strength of seam" to be 2*(tensile strength of
material sewn). "Neatness" of the stitching is possibly
counter-productive, as a wandering stitch (sub-parallel to webbing or cord length)
captures more weft or sheath fibers.
Special
warning: rock climbers who post on internet forums, after drinking,
should not do their own sewing! Nor should they handle tools.
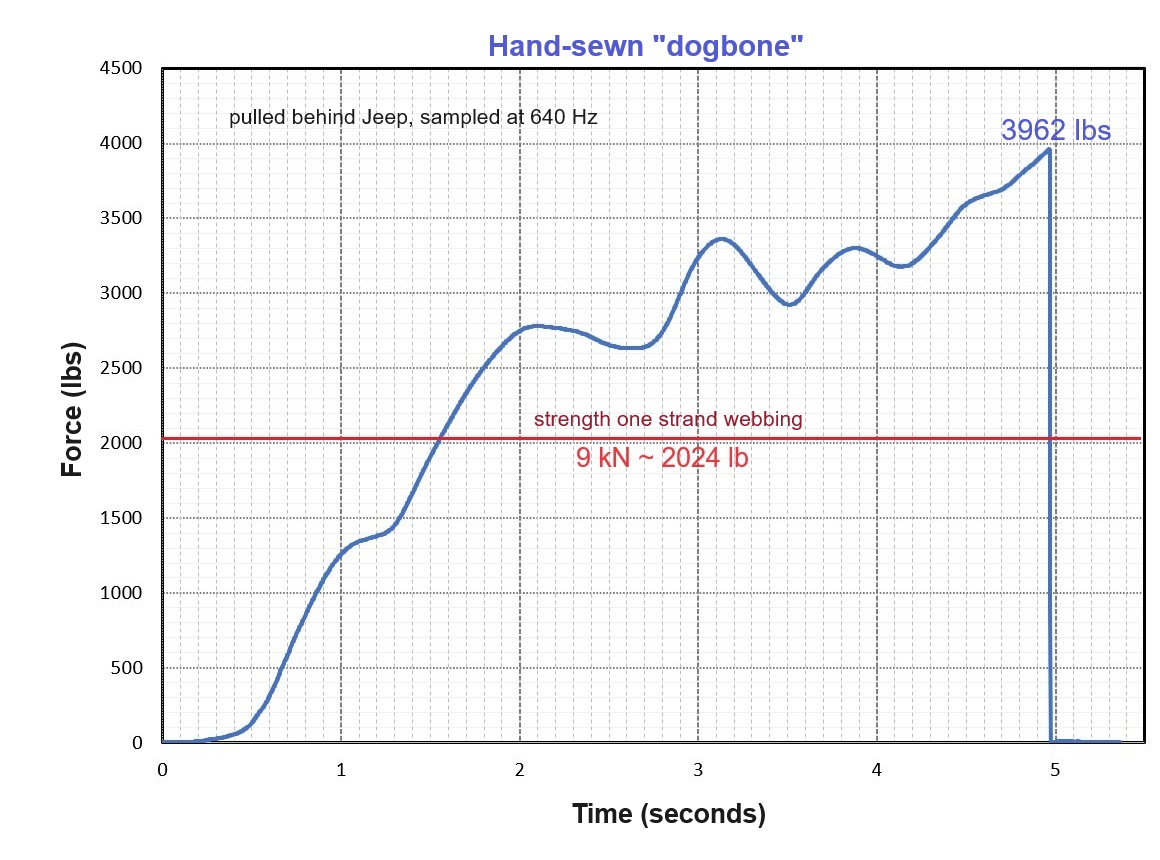
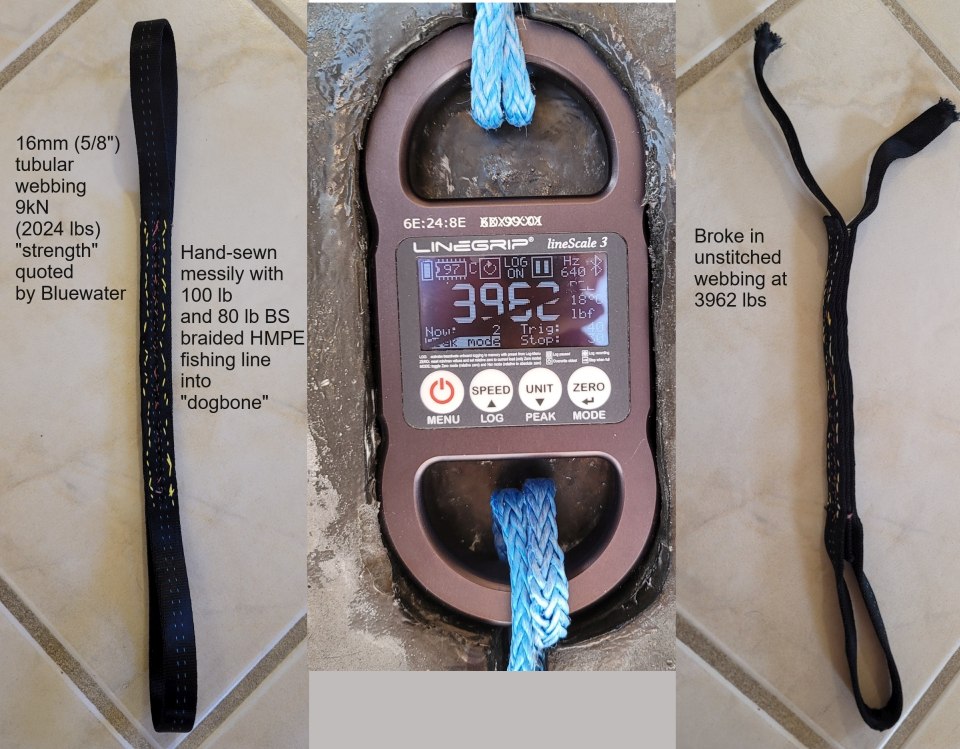
1) 16 mm Webbing. Here is my messy stitching of a "dogbone" with 16mm (variously claimed
to be 9/16" or 5/8") nylon climbspec tubular webbing. I used 80 and 100
lb spectra (HMPE or UHMWPE) braided fishing line for "thread." Note the
loop breaking strength was 196% of the quoted webbing strength. [click
for hi-res image]
My dominant hand is partially paralyzed, and it is impossible for me to sew "neatly."
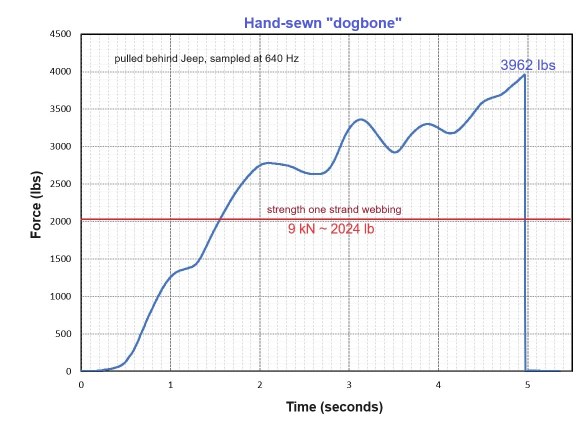
As a plot [click for hi-res image]:
But why do manufacturers use bar tacks, if the pattern is nearly
irrelevant? Mainly because bar tacks provide an easy way to get many
threads
in a small area, they are easy to count, and the machines can be used by people with little skill. They have a
downside: if the tension setting is not right, bar tacks can actually
break the fiber they are sewing. (I once took apart the bar-tacks on a
harness from "a trusted manufacturer," and discovered the webbing
beneath the bar tack was nearly severed.)
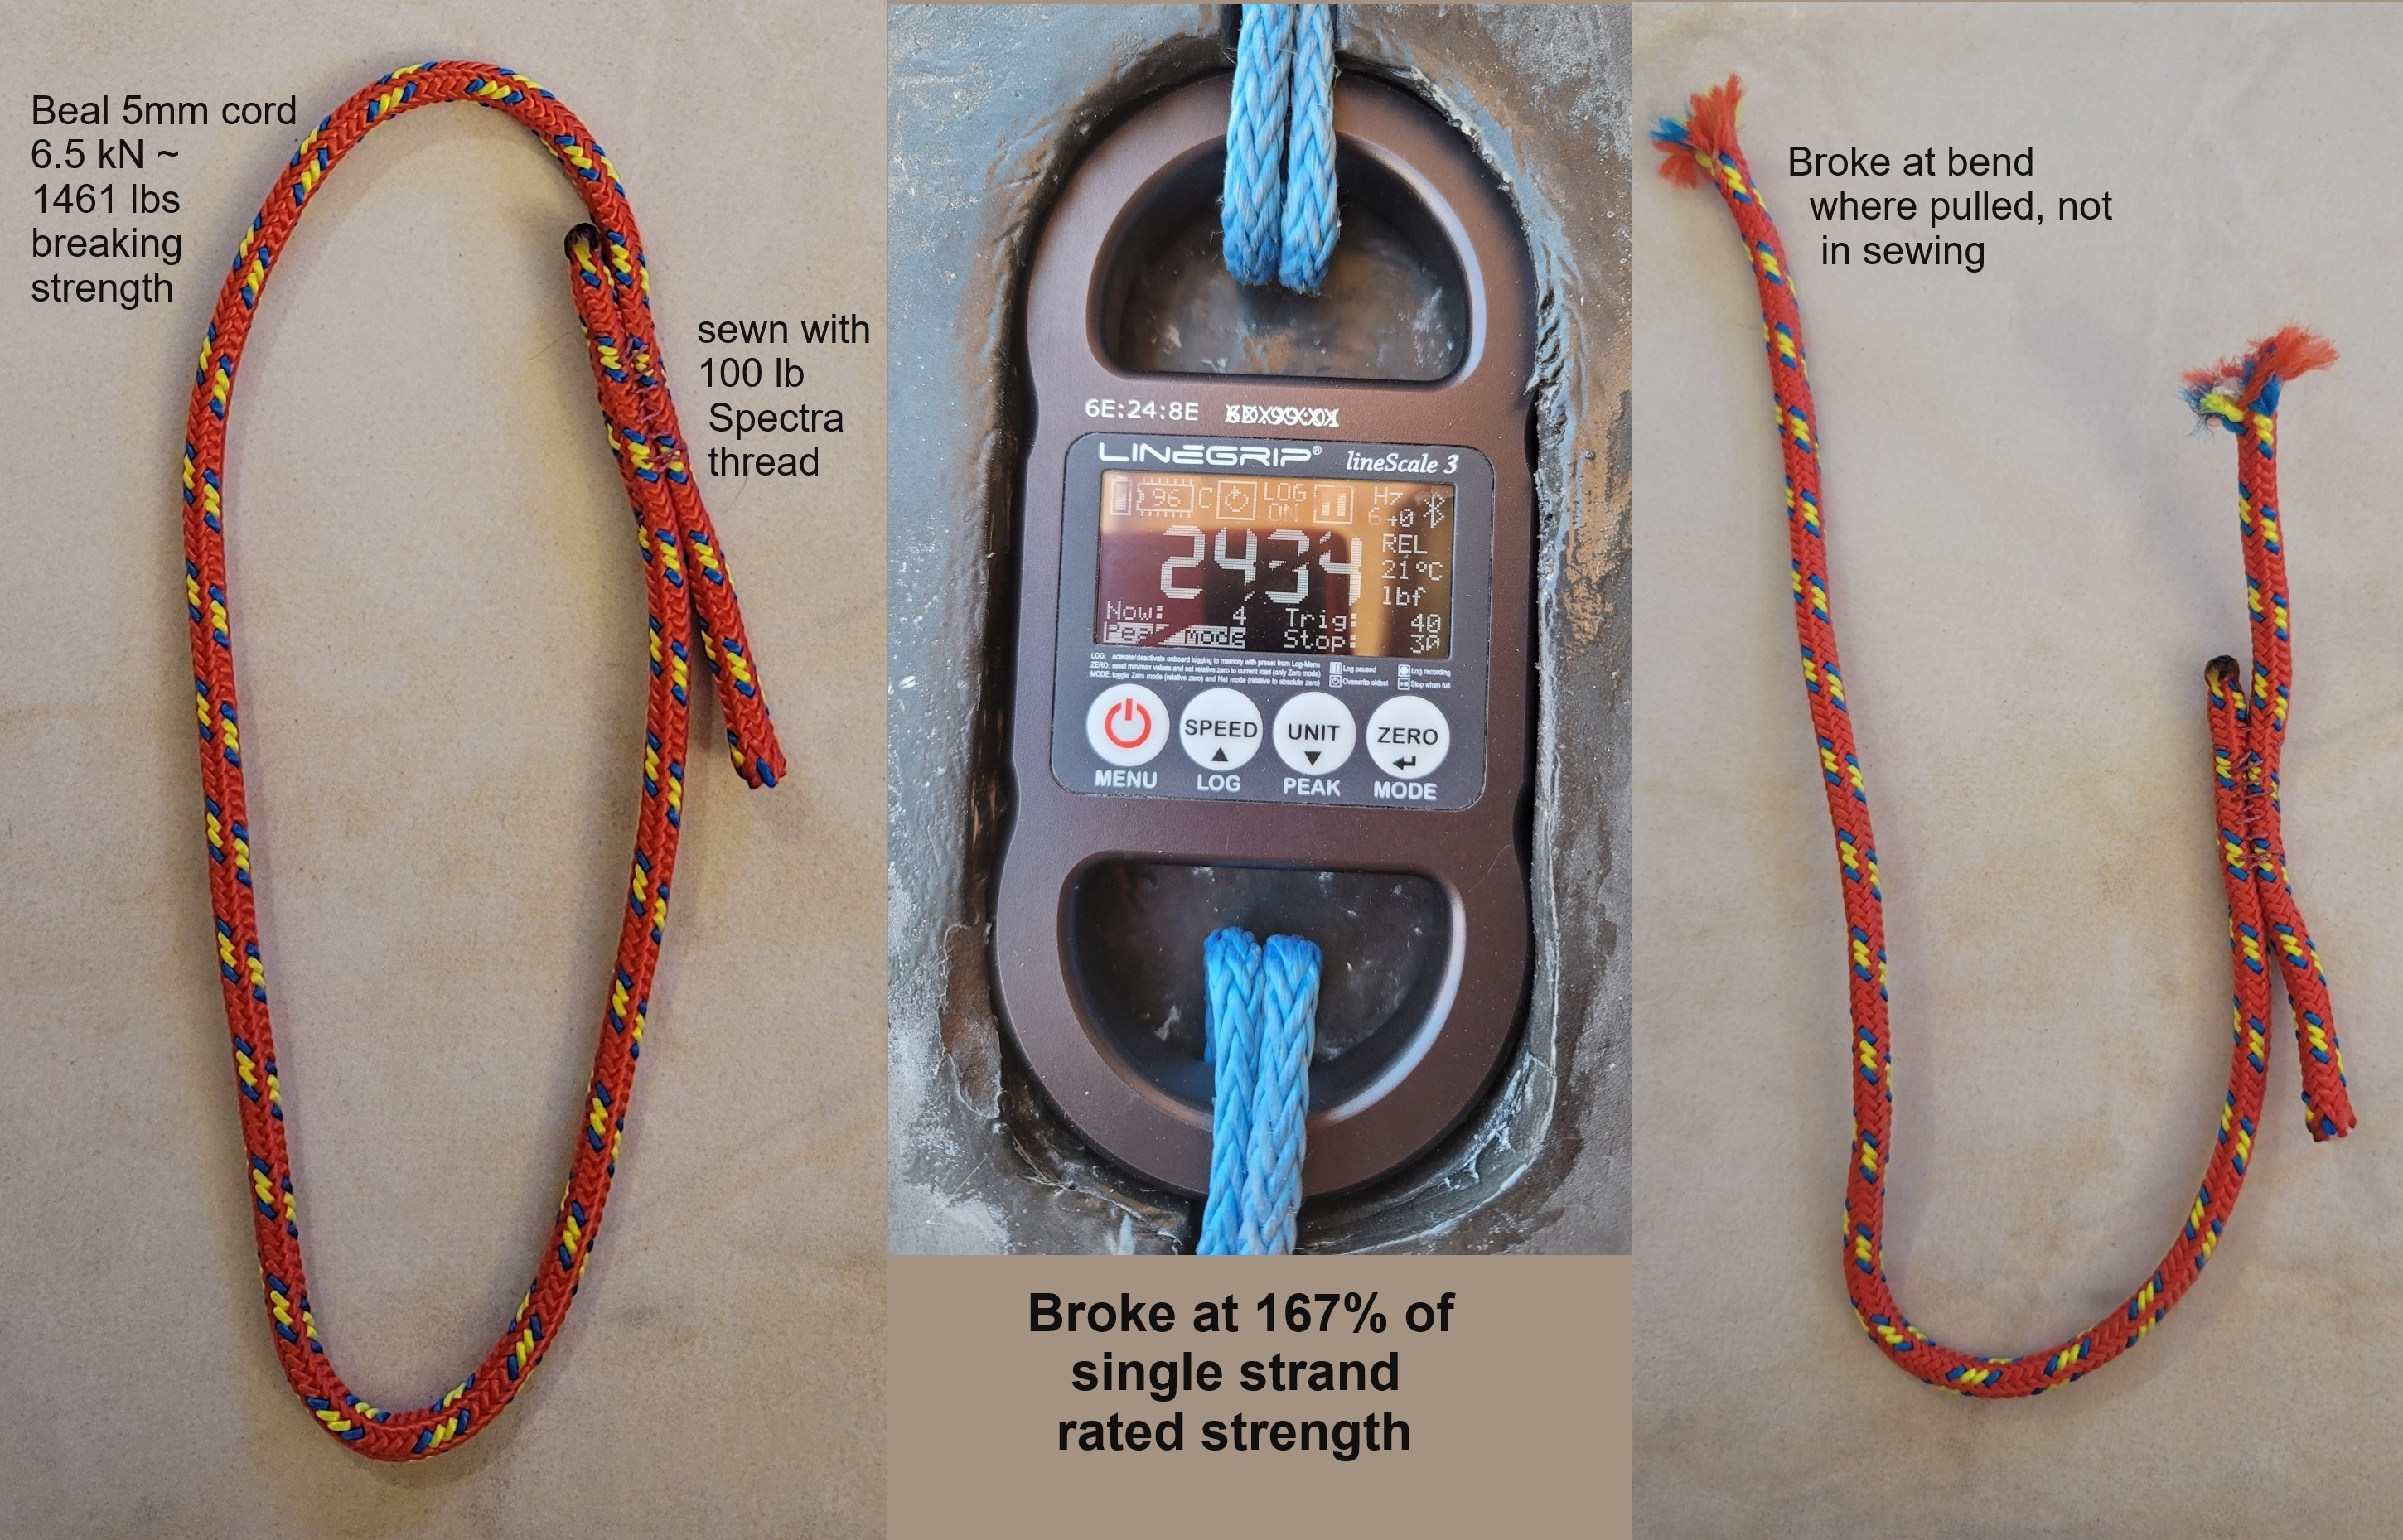
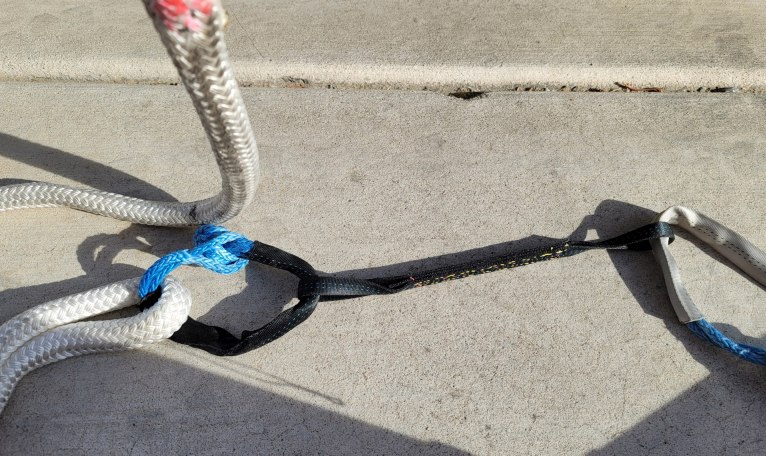
Here are some pictures of the break setup [click for hi-res image]:

And a zoom [click for hi-res image]:
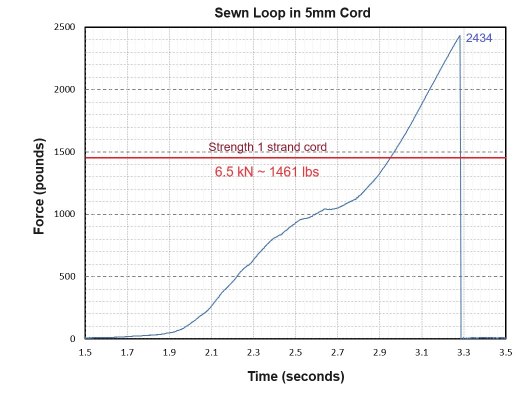
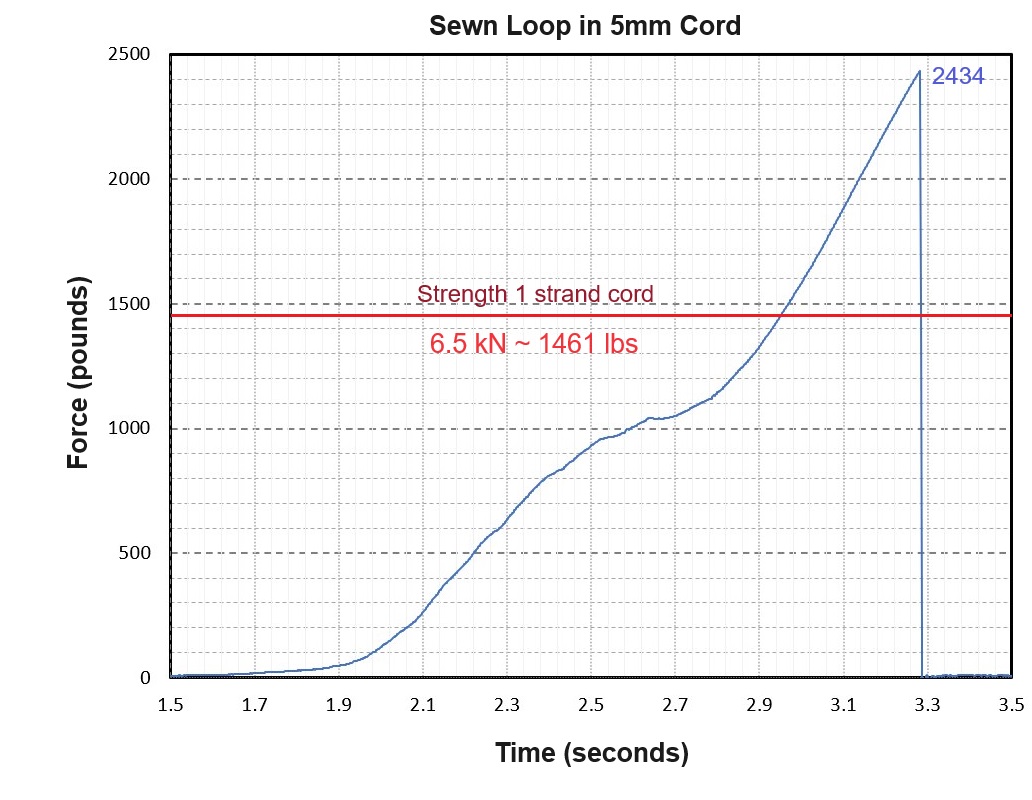
2) 5mm Cord.
This test likely gives an underestimate, since the pull was fast and
the system contained only soft goods to pull the loop, allowing
fairly tight turns in the cord. The significant issue is that the cord
did not break in or near the stitching. In real applications, I trim
the melted ends close and cover the sewn part with shrink tubing to
protect the stitches. [click for hi-res images]

Again the plot: