|
CONTENTS |
Sometimes the route up a mountain is not obvious. For example, there might be many gullies, yet only one that is not blocked by cliffs. Or part of the route may be through dense brush that obscures the view. If you have a GPS, you might be able to get a pre-existing track from someone who has been on the peak before. Within limits, this track can remove a lot of uncertainty from route-finding, and give that extra margin of safety to the climb.
But how do you transfer those tracks to your GPS? Often the tracks are hundred of points long, and you certainly don’t want to enter them by hand on the GPS screen.
However, there are computer programs that can read the tracks files, simplify and manipulate them, print the tracks on topographic maps, and ultimately transfer the tracks to your GPS. The process for putting those track files on your own GPS is the subject of this note.
First of all: does your GPS have a computer connection? If it doesn’t, you can stop reading right now. Furthermore, this discussion is aimed at PCs that run the Windows operating system.
Second, does your GPS accept uploaded tracks? If so, what is the maximum size track it will allow? Many modern GPS units will accept 10-20 tracks of 200 to 500 points each. Usually this limit is discussed in your user manual, or in the on-line descriptions at the manufacturers’ web sites.
Even if your GPS does not accept uploaded tracks, it probably accepts waypoints or routes. Some of what I am about to say still applies to you, but the truth is, uploading waypoints is easier and more universal, so I won’t discuss that specifically here. In the following examples, the waypoints are in the file too, and “come along for the ride”.
Third, there is the sticky matter of datum. Datum tends not to matter, as most track files are relative to the native datum of the GPS: WGS84. However, it is possible that you will get simplified trackpoints relative to another datum, typically NAD27, in a text file. The examples here don’t cover that eventuality, so it is best to ask the sender how the points were saved. Else, you can often do a consistency check on the topo map, after upload: if the track ends at the marked highpoint, chances are the datum was OK.
Fourth, please understand the limits of GPS accuracy. In the best of conditions, with full WAAS corrections and an open view of the sky, the day-to-day uncertainty is about +/- 7’ for normal, handheld GPS units. That may not seem like much, but when you are traversing a cliff, that horizontal uncertainty can translate to another ledge, 10 or 20 feet down, or up for that matter. In steep mountains or canyons, the GPS sees far fewer satellites, and the uncertainty often climbs to 100’. For that reason, you may see wild spikes for GPS records taken in chutes and canyons. In such cases, follow your instinct.
Where Do You Get the Track Files?
People can send you track files by e-mail, or you might find the files on the web. The files come in a bewildering array of formats – but the world is getting more accepting of the GPX format (file extension .gpx), which is really just a version of xml, very much like the html web page language. There are various text formats (txf, mxf, csv) that can be edited with a normal text editor (e.g. WordPad), and there are some binary formats, like GDB from Garmin. For now we’ll focus on GPX files, since they are the most universal.
To start with, let’s find a file on a web page. Below is a screen shot from my
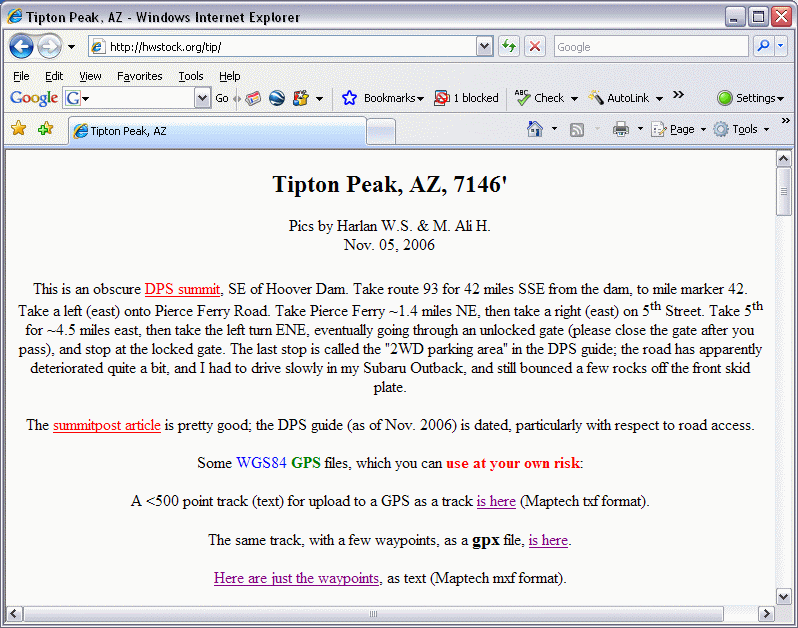
(Remember, the image above is just a picture of the web site; you’ll have to go to http://hwstock.org/tip/ to get the real web page and download the file!)
We’ll pick the gpx file. Clicking on that “is here” link gives slightly different responses, depending on your operating system and browser. Most sane browsers will let you right-click on the link and just download the file to your desktop. In Win XP with internet explorer 7, the xml code is just read into a window, as in the following picture. It looks like gobbledygook, but you don’t care; you just want to download that file to your computer. So within IE (the browser), select the file menu in the upper left-hand corner, and pick “Save As”, as shown below:
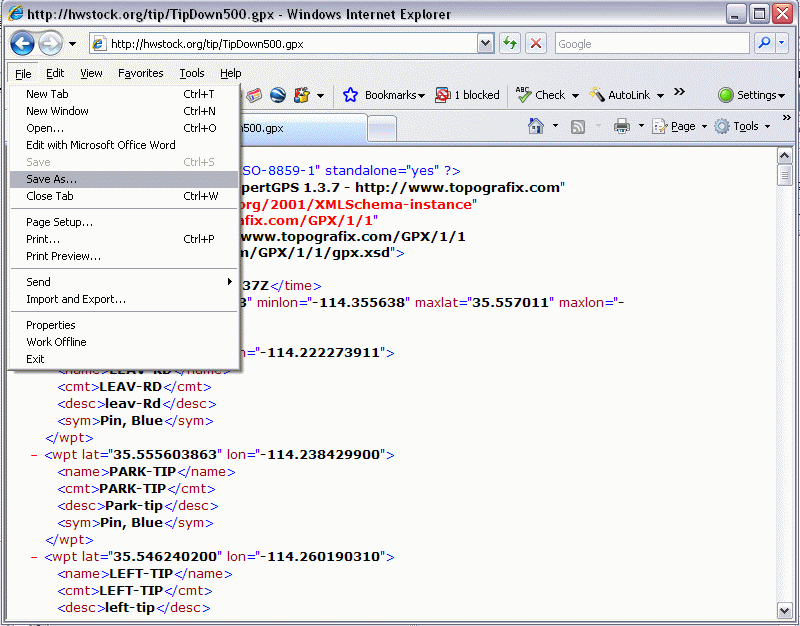
Next you’ll get a menu that allows you to pick where you will save the file – it certainly won’t have the same directories as shown below, on my home computer, but you can pick where you want to save the file. Just remember where you put it!

Note the file is called “TipDown500.gpx”.
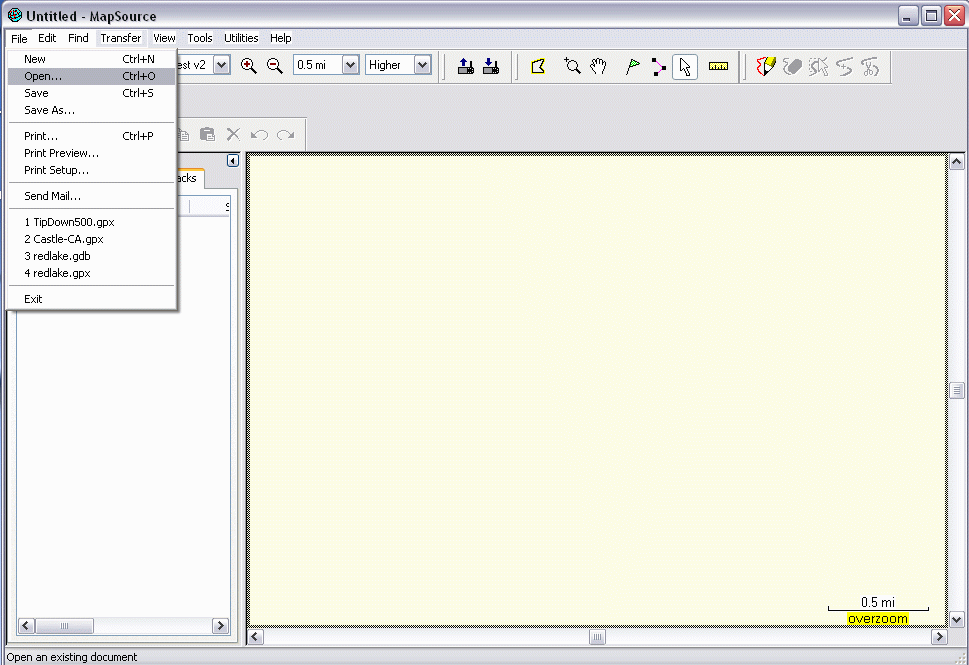
If you have a recent Garmin GPS, the bundled program “MapSource” is one of the easiest (and cheapest) ways to transfer the file to your GPS. This program will work even if you have none of the special Garmin topo maps installed. Furthermore, recent versions will read GPX files. (You can update for free via the Garmin website.) I’m assuming that you have already installed MapSource and connected the interface cable to your computer.
First, plug the other end of the interface cable into your GPS, and start up the MapSource program. To read in the track file, select the file menu in the upper left corner and select “Open…” as below:
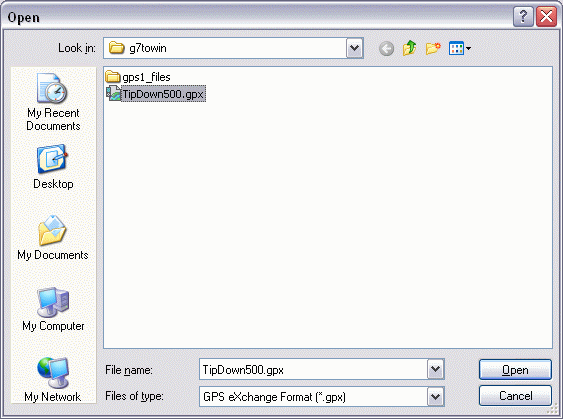
Next you will get a dialog box something like the one below. Navigate to the previously downloaded file (TipDown500.gpx), and select it with “Open”.
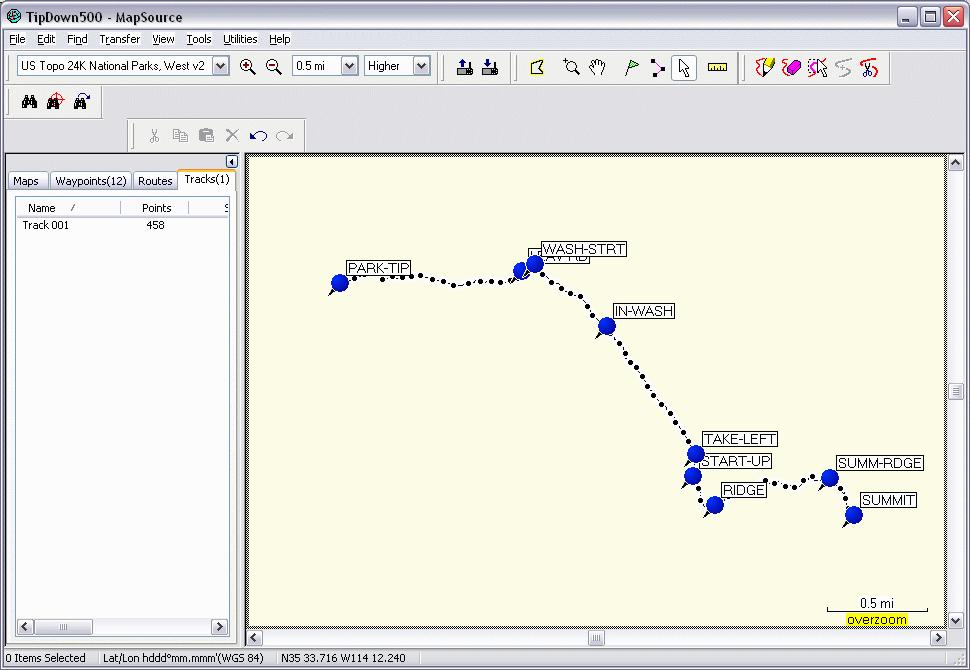
The track (and in this case, the waypoints as well) will appear on the screen. I didn’t name this track, so it is simply called “Track 001”.
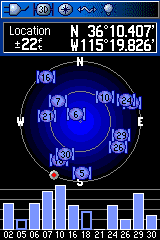
Now would be a good time to make sure your GPS is turned on and connected to the computer! The 60csx, when turned on, eventually settles on this screen:
Now, back at the computer, click on this icon:![]() on the
toolbar. You’ll get a dialog like this:
on the
toolbar. You’ll get a dialog like this:
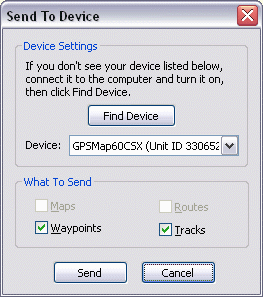
After the “Device:” field above shows your GPS, click “Send”.
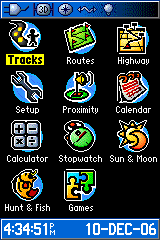
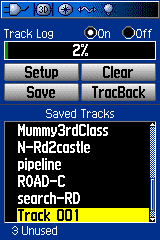
Back at the GPS, you can check (if you so desire) to see if the track was uploaded. On the 60csx, hit the “Page” button till you reach this multi-icon page with “Tracks” in the upper left corner. Highlight “Tracks” (if not already selected) and press “Enter” on the GPS.
Now you’ll see a list of tracks. You can scroll through any list of tracks with the cursor, and will see your recent upload.
The Track Got Truncated! What Do I Do?
The track in the previous example happens to be less than 500 points long, and therefore can be uploaded, in entirety, because the 60csx limit (for uploaded tracks) is 500 points. But what if the track is too long for your GPS? Typically, the GPS merrily uploads the first points of the track, then truncates. There is a warning message about the truncation, but this message is often overlooked. (Most GPS units have a much smaller limit for “uploaded” tracks than for “active log” tracks or even for tracks stored on memory cards.)
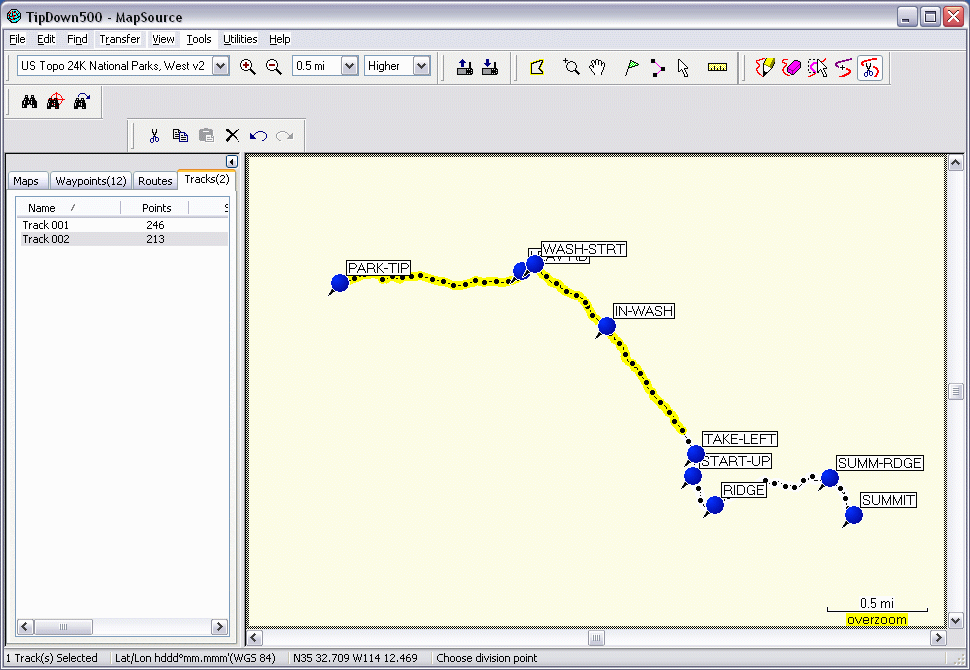
A simple solution, available in MapSource, is to break the track into segments that are individually less than the limit. For this example, go to the “Tools” menu, as shown below, and pick “Track Divide”:
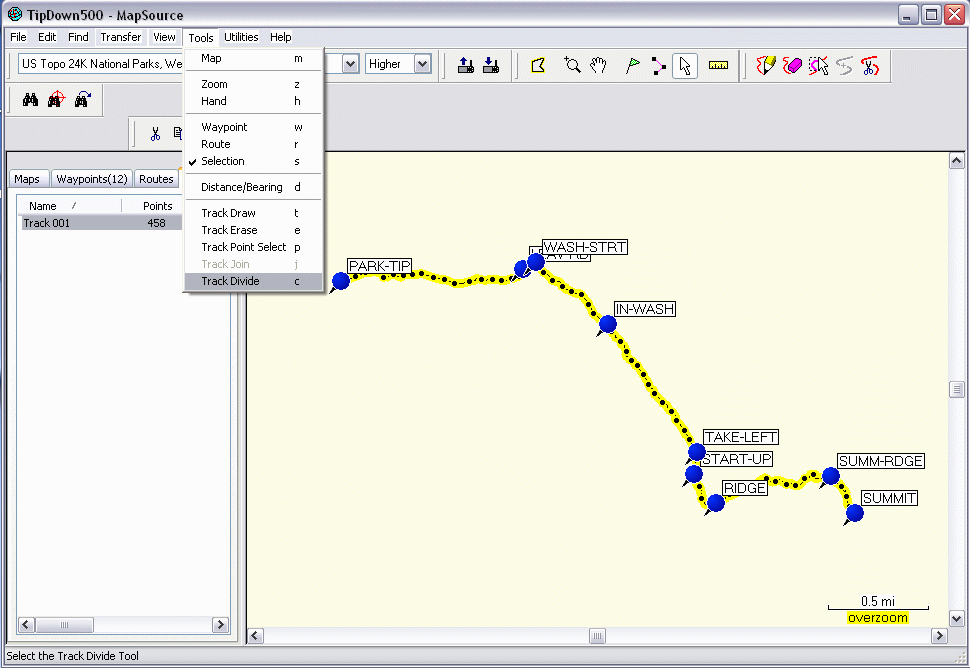
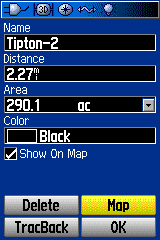
This selection allows you to move the cursor over the track, pick a point, and divide the track in two. The process is somewhat hit-or-miss, since you can’t see the number of points in each segment till after the division; but you can always hit the “Undo” button. The two track segments are automatically renamed, as shown at left below. You can click on the names in the left pane, and edit the track names to something more descriptive. In this case, I’ll change the names to “Tipton-1” and “Tipton-2”.
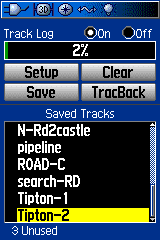
We can repeat the upload procedure, and this time, all the tracks are sent to the GPS (below is the 60csx screen):
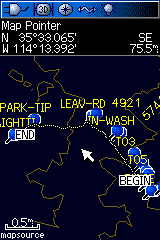
If we highlight the “Tipton-2” track as above, and press the GPS “Enter” key, we get the following screen. If we highlight “Map” and press enter…
…we see the screen below, which shows us the track on a map.
Adjusting Track Length: Other GPS Programs
There are other, inexpensive GPS programs that handle the adjustment of track length with a few more option. These other programs can also "open" (read in) an existing file, then divide the track if needed, and upload the track(s) to your GPS. However, they can also “simplify” the track, keeping it as one unit, but reducing the total number of points. Here is how ExpertGPS (www.ExpertGPS.com) implements “Simplify”:
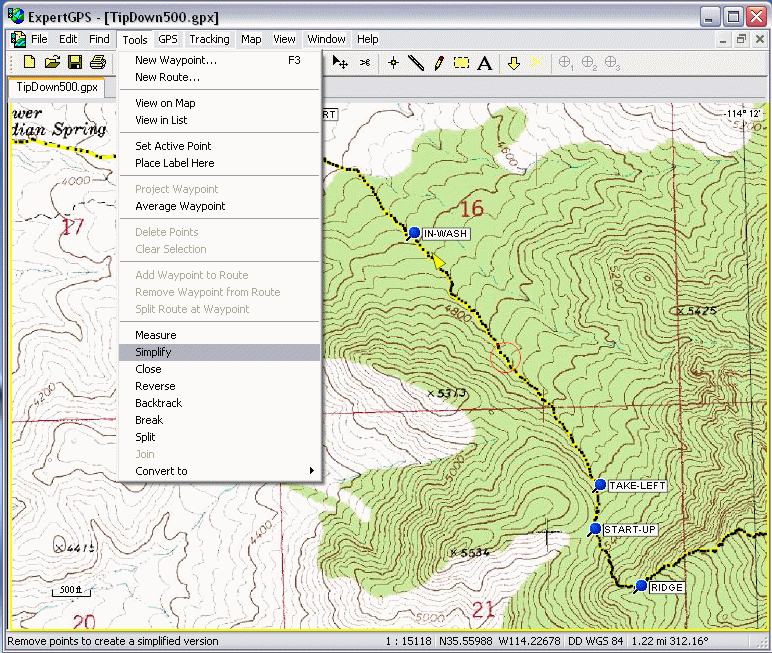
The ExpertGPS simplify command doesn’t give you many options, and you have to keep checking to see when the track gets reduced below the number of points allowed (by your GPS) for an uploaded track. You can always “undo” (edit menu) to back up to a previous selection.
And here is Topofusion (www.topofusion.com):
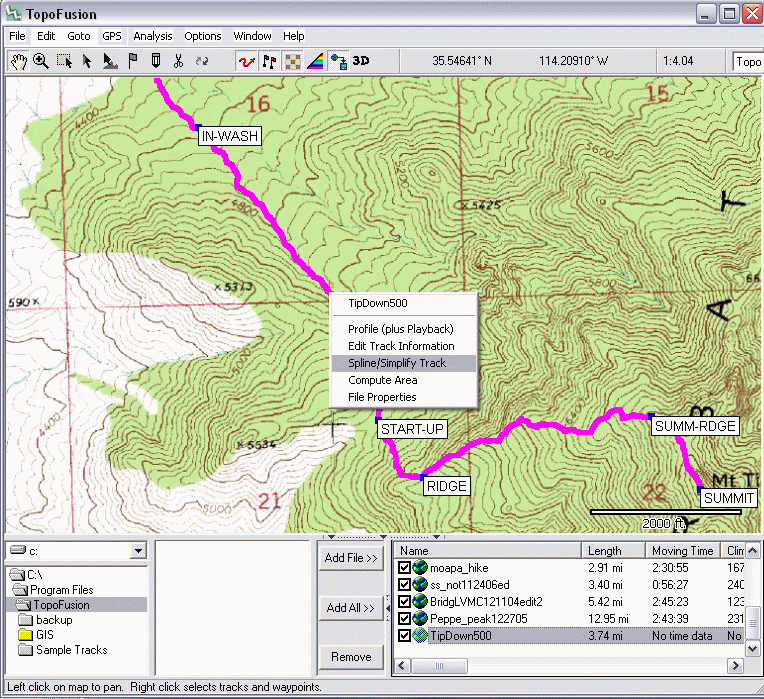
In Topofusion, you must right click on the track to highlight, then choose simplify from the menu.
A caution about using simplify commands: they tend to remove points in areas of highest density, which are also likely to be areas where route-finding is the most critical.
There are a few downsides to these two inexpensive programs (ExpertGPS and TopoFusion). First off, they require broadband internet; that’s because they use the topo maps and aerial photos stored on MicroSoft’s Terraserver site, or DEMs (Digital Elevation Models) from other sites. Second, the topo maps at Terraserver are not that great – they were scanned at about ¼ the resolution used in programs that supply the topo map images on CDs or DVDs. E.g., Memory Map, Maptech Terrain Navigator, or National Geographic Topo! all supply the maps on disks. Third, you are at the mercy of the traffic on the free Terraserver and NASA sites. Usually there are good response times on those sites, but I have seen some services go out for days. On the plus side, the programs that depend on Terraserver give you coverage for the entire country; most programs make you buy all the maps for each state separately.
You can use a simple, free program to upload waypoint files, from a Windows PC, to your GPS. This program is G7towin, and is available at
http://www.gpsinformation.org/ronh/
There is no map interface in this program, but it will work with most GPS units, and can deal with a wide variety of formats. The program is fast and small, and there is no installation, other than unzipping the program file (and help file) into a directory on your computer.
You can also use G7towin to upload tracks, provided the tracks are no bigger than the size restrictions placed by your GPS.
When you unzip the program, the first thing to do is start it and select “Configuration…”, as shown below:
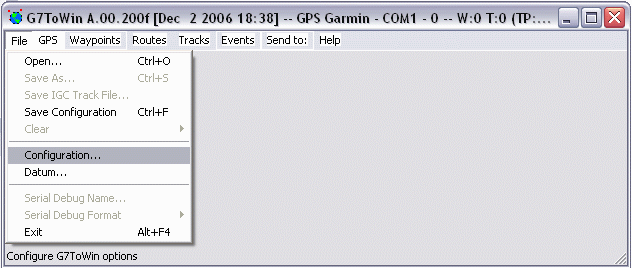
The selection will bring up a configuration window:
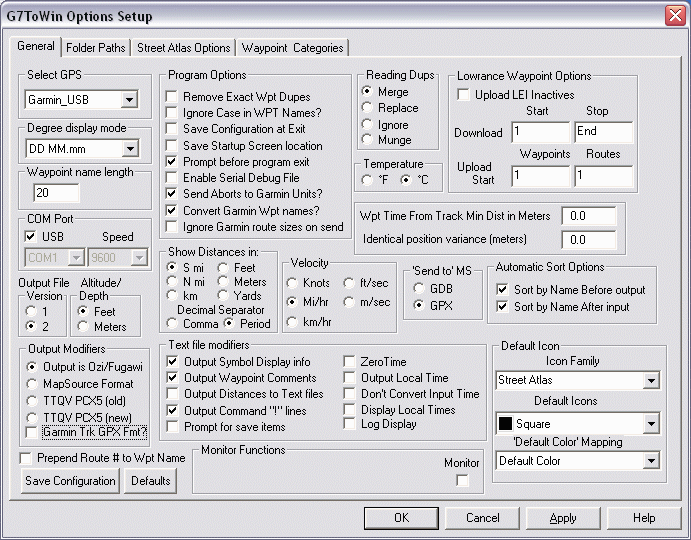
All the important stuff is in the upper left-hand corner; select your type of GPS, and the type of port you are using. In most modern GPS units, you will probably use the USB port; else you can select one of the “COM” (serial) ports. You can also set the default datum elsewhere. Finally, be sure to click “Save Configuration”.
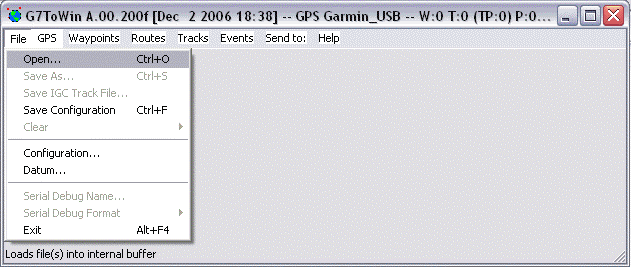
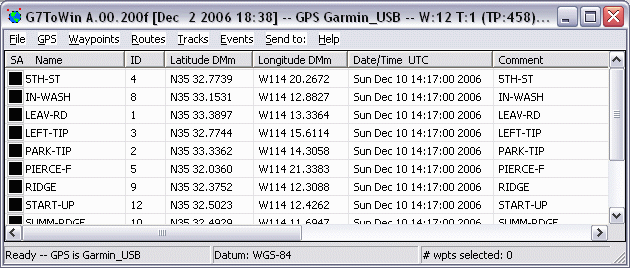
We can use this program to upload the track, much as before. First we select “Open” in the file menu:
Then we select the track…
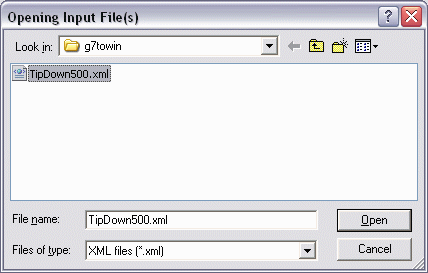
…and open it. (I’ll talk about the “xml” file ending in a bit.) Below is the view for the waypoints; you can also view the track.
Now is a good time to make sure the GPS is turned on and connected to the computer. Here is the satellite screen on my 60csx:
Now we can select “GPS” on the computer program, select upload, then “Tracks (Garmin)”:

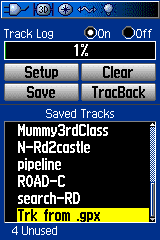
We can go back to the GPS, page to this menu, highlight “Tracks”, press enter…
…and see that our track was uploaded.
…and that’s all for now!
Oh yes, the “xml” vs. “gpx” bit. I downloaded the file for this last demo by “right-clicking” on the gpx link at my website, and using, “Save target as”. One of the new “features” of Internet Explorer 7, is that it likes to think for you, and usually makes bad choices – much like a mid-level manager at you workplace. In this case, IE7 refuses to let you choose the extension for a gpx file – it recognizes that the file is in xml format, and is so proud of itself, that it insists on the xml extension. That might be a problem, but fortunately, G7towin offers xml as one of its upload format choices.